Getting Started with Issac
I’m going to keep a list of resources and steps to follow to duel boot Ubuntu and install Isaac Gym
Requirements:
First thing to do is check the requirements. Go to the following URL : isaac-gym
There you can register and access the members area. The members area has some information about the installation process. Below is an image of some of the pertinent information :

I will be using ubuntu 20.04 for my setup. You can follow the ubuntu installation instructions found here : Ubuntu Install Instructions
It is fairly comprehensive and should get you going with the ubuntu distribution of your choice.
ATTENTION!!
Pay close attention to which drive you are installing ubuntu onto. You don’t want to overwrite your main OS!!
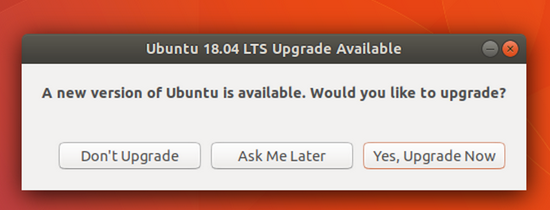
When you first get into Ubuntu 20.04 (or 18.04) you may be prompted to update to a newer release (22.04). Don’t do it or you’ll need to start over.

Installing Isaac
Navigate to Isaac Gym and log in or create an account


Agree to the terms if the Nvidia Isaac Gym License Agreeement and you should be rewarded with Prerequisits and a big green install button.

Before we install, lets check our NVIDIA Drivers.
Open the Ubuntu Software & Updates

Open the Additional Drivers tab and select Using NVIDIA driver metapackage from nvidia-driver-470 (proprietary)

Apply the changes and wait for the drivers to update. This may take a few minutes.
Reset your computer… you may get cuda related errors later if you don’t
Go back to the big green install button… click it

a compressed file will download containing a folder called isaacgym.
The extraction tool should open automatically as well.
I’m going to extract it to my ~/MachineLearning directory but you can put it anywhere you’ll remember it.
Anaconda (Package Manger)
We will be using anaconda as a package manager to keep our install in a corner where it is less likely to be messed up when we start a other projects in the future. It will help maintain the package versions that work so you don’t need to constantly be worrying when doing using packages with newer versions on other projects.
Open Anaconda
cd ~/anaconda3/bin/
./anaconda-navigator
If someone wants to tell me how to get a normal launch icon going I’d be happy to add it to the directions…
From the Anaconda main page, click the environments tab on the left side menu

Click the Create button at the bottom of the screen to bring up a configure dialog for our new environment.
Where going to name it isaac and give it a python version of 3.8

Click the create button and wait a little bit while it sets things up.
Once the environment is created, we can launch a terminal window with our environment enabled by clicking the play button and open terminal.

Navigate to you the python directory
cd ~/MachineLearning/isaacgym/python
run the python install script
pip install -e .This is executing setup.py if you are interested. It contains a list of required packages and their versions. If you mess up your isaac install by upgrading some packages (I did this with rl-games once) this is usually a good place to start trying to backtrack
Testing some examples
If everything went well, we should be able to run the isaac examples.
Navigate to …/isaacgym/python/examples
run anything in this directory. There are a lot of cool examples. Make sure things run without any errors.
python joint_monkey.py

Installing IsaacGymEnvs
(Where the learning happens)
Isaac Gym Envs Git Repo
Navigate back to the folder you stored isaacgym in.
cd ~/MachineLearning
Clone the IsaacGymEnvs github repo
git clone https://github.com/NVIDIA-Omniverse/IsaacGymEnvs.git
If git isn’t installed, run sudo apt install git
Go into the IsaacGymEnvs directory
cd IsaacGymEnvs
run the pip installer
pip install -e .
Training Time
Lets test the new install by training a cartpole environment.
Go into the isaacgymenvs directory
cd ~/MachineLearning/IsaacGymEnvs/isaacgymenvs …
Run the python training script :
python train.py task=Cartpole
There are more example projects that can be run
An Error I got…
I got an error :
RuntimeError: CUDA error: no kernel image is available for execution on the device
CUDA kernel errors might be asynchronously reported at some other API call,so the stacktrace below might be incorrect.
The best I can tell after googling the error above, this is a problem with the version of torch that was installed. We can update torch by following the instructions at there website : Torch Getting Started
First run
pip uninstall torch torchaudio torchvision
Then run the install command from the torch installation webpage (pictured below)

After making these changes everything seems to be working correctly.
python train.py task=Cartpole
There are a lot of bugs that can crop up though so you may run into one that I didn’t. You should be able to find answers with a little googling (after sifting through a lot of websites)
Very Quick Exploration
#Add an Exploring the project directory section later
Extras
Just some programs I like to install when I’m getting set up. I use these all the time
From a terminal, navigate to the downloaded script to install anaconda
cd ~/Downloads
chmod +x Anaconda3-2022.05-Linux-x86_64.sh
./Anaconda3-2022.05-Linux-x86_64.sh
the q key lets you skip the terms and conditions, otherwise you need to scroll a lot
you can leave all the settings to default unless your comfortable with it set up some other way.
Running it from the default install location
From a terminal, run the following :
cd ~/anaconda3/bin
./anaconda-navigator