This page is a work in progress. I haven’t documented the work for these yet
Getting Started with Issac
I’m going to keep a list of resources and steps to follow to duel boot Ubuntu and install Isaac Gym
Requirements:
First thing to do is check the requirements. Go to the following URL : isaac-gym
There you can register and access the members area. The members area has some information about the installation process. Below is an image of some of the pertinent information :

I will be using ubuntu 20.04 for my setup. You can follow the ubuntu installation instructions found here : Ubuntu Install Instructions
It is fairly comprehensive and should get you going with the ubuntu distribution of your choice.
ATTENTION!!
Pay close attention to which drive you are installing ubuntu onto. You don’t want to overwrite your main OS!!
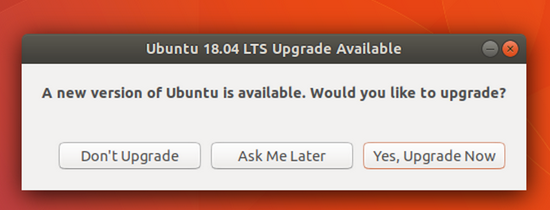
When you first get into Ubuntu 20.04 (or 18.04) you may be prompted to update to a newer release (22.04). Don’t do it or you’ll need to start over.

Installing Isaac
Navigate to Isaac Gym and log in or create an account


Agree to the terms if the Nvidia Isaac Gym License Agreeement and you should be rewarded with Prerequisits and a big green install button.

Before we install, lets check our NVIDIA Drivers.
Open the Ubuntu Software & Updates

Open the Additional Drivers tab and select Using NVIDIA driver metapackage from nvidia-driver-470 (proprietary)

Apply the changes and wait for the drivers to update. This may take a few minutes.
Reset your computer… you may get cuda related errors later if you don’t
Go back to the big green install button… click it

a compressed file will download containing a folder called isaacgym.
The extraction tool should open automatically as well.
I’m going to extract it to my ~/MachineLearning directory but you can put it anywhere you’ll remember it.
Anaconda (Package Manger)
We will be using anaconda as a package manager to keep our install in a corner where it is less likely to be messed up when we start a other projects in the future. It will help maintain the package versions that work so you don’t need to constantly be worrying when doing using packages with newer versions on other projects.
Open Anaconda
cd ~/anaconda3/bin/
./anaconda-navigator
If someone wants to tell me how to get a normal launch icon going I’d be happy to add it to the directions…
From the Anaconda main page, click the environments tab on the left side menu

Click the Create button at the bottom of the screen to bring up a configure dialog for our new environment.
Where going to name it isaac and give it a python version of 3.8

Click the create button and wait a little bit while it sets things up.
Once the environment is created, we can launch a terminal window with our environment enabled by clicking the play button and open terminal.

Navigate to you the python directory
cd ~/MachineLearning/isaacgym/python
run the python install script
pip install -e .This is executing setup.py if you are interested. It contains a list of required packages and their versions. If you mess up your isaac install by upgrading some packages (I did this with rl-games once) this is usually a good place to start trying to backtrack
Testing some examples
If everything went well, we should be able to run the isaac examples.
Navigate to …/isaacgym/python/examples
run anything in this directory. There are a lot of cool examples. Make sure things run without any errors.
python joint_monkey.py

Installing IsaacGymEnvs
(Where the learning happens)
Isaac Gym Envs Git Repo
Navigate back to the folder you stored isaacgym in.
cd ~/MachineLearning
Clone the IsaacGymEnvs github repo
git clone https://github.com/NVIDIA-Omniverse/IsaacGymEnvs.git
If git isn’t installed, run sudo apt install git
Go into the IsaacGymEnvs directory
cd IsaacGymEnvs
run the pip installer
pip install -e .
Training Time
Lets test the new install by training a cartpole environment.
Go into the isaacgymenvs directory
cd ~/MachineLearning/IsaacGymEnvs/isaacgymenvs …
Run the python training script :
python train.py task=Cartpole
There are more example projects that can be run
An Error I got…
I got an error :
RuntimeError: CUDA error: no kernel image is available for execution on the device
CUDA kernel errors might be asynchronously reported at some other API call,so the stacktrace below might be incorrect.
The best I can tell after googling the error above, this is a problem with the version of torch that was installed. We can update torch by following the instructions at there website : Torch Getting Started
First run
pip uninstall torch torchaudio torchvision
Then run the install command from the torch installation webpage (pictured below)

After making these changes everything seems to be working correctly.
python train.py task=Cartpole
There are a lot of bugs that can crop up though so you may run into one that I didn’t. You should be able to find answers with a little googling (after sifting through a lot of websites)
Very Quick Exploration
#Add an Exploring the project directory section later
Extras
Just some programs I like to install when I’m getting set up. I use these all the time
From a terminal, navigate to the downloaded script to install anaconda
cd ~/Downloads
chmod +x Anaconda3-2022.05-Linux-x86_64.sh
./Anaconda3-2022.05-Linux-x86_64.sh
the q key lets you skip the terms and conditions, otherwise you need to scroll a lot
you can leave all the settings to default unless your comfortable with it set up some other way.
Running it from the default install location
From a terminal, run the following :
cd ~/anaconda3/bin
./anaconda-navigator
Learning To Walk
I’ve switched to a quadruped design to start, I think the added stability of two more legs will give me a better chance at early success in my sim to real work. It allows for a larger chassis size which I needed for additional components like a battery, power distribution system, and a real-sense camera. All in all I think this a good direction for now and I’ll return to the two legged variant when I have a better understanding of the sim to real challenges I will be facing.
So lets recap. Basically for months, I’ve been stuck with a bug of sorts. The learned policies when given the “Gods Eye” observations (Full State knowledge) were really good. There robots were able to locomote well. The reduced observation set has consistently had issues with learning good policies.
Originally I was creating a simulated IMU type measurement and feeding the raw signals to the network
Now I’m just calculating the local velocity and angular velocity and giving that to the network
I imagined orientation could be learned from the IMU signals but processing it and feeding the results in will probably save some training time
This hasn’t been done yet
I wasn’t sure what type of bug I was looking for. Tensor shapes have been such a common source of problems that I tend to always start here. I also had changed the reward and observation at the same time, so I wasn’t sure if the bug was in one or the other. To me, how the reward is given could have been a source of problems. The early reward structure was attempting to match the robots local vel with the command vel. I imagine if the robot was only able to walk well at one specific speed (Due to my slapdash design), this type of reward could be very detrimental to the learning process. I switched over to matching a command heading with any achievable velocity, although this could have it’s pitfalls as well. Coupled with rewards designed to minimize torque, it may learn how to move but at a very low speed.
I want to have a hybrid of the first reward structure and the current command input style I was going for. We basically can set the target location to :
Walkbot_Pos * Command_Vel * dt
Anyways there have been training problems and I’ve been picking apart the code for bugs for a while now. I think I finally stumbled into some positive news, providing roll-pitch-yaw data seems to have helped train working polices.
Starcraft 2 AI
I feel like this one is gonna be hard. These are the resources I’m starting with. I suppose my goals are :
Get the API working and kind of understand what is going on
Get a bot onto the ac2ai ladder
Start trying to apply RL to my bot.
Some useful starting links
https://github.com/deepmind/pysc2
https://sc2ai.net/
https://pythonprogramming.net/starcraft-ii-ai-python-sc2-tutorial/
https://itnext.io/build-a-zerg-bot-with-pysc2-2-0-295375d2f58e
For 1) and 2) I am just going to try and get the most basic of bots running, I’m not looking to win anything, just figure out how these systems work. Once I think I understand how this all works I will try applying reinforcement learning to my AI.
Part 1 : How does this sc2py api work?
Installation :
I already have sc2 installed via battle net
I created a new anaconda environment for sc2_ai. This was started with python version 3.8
I am installing it and getting things running via : https://github.com/deepmind/pysc2
General Reinforcement Learning info
Problem Statement :
An agent interacts with it’s environment over discrete time steps. At time step ($t$), the agent observes an observation vector ($x_t$) and chooses an action ($a_t$) according to it’s policy $\pi(a|x_t)$ and observers a reward $r_t$ produced by the environment.
The goal is to maximize the discounted returns as defined by $R_t = \sum_{t\leq 0}\gamma^i r_{t+i}$ where $\gamma$ is the discount factor. $\gamma \in [0,1))$
We can use state, action values or state values to define the expected returns from a given state, action pair or state respectively.
$Q^\pi(x_t,a_t) = \mathbb{E}_{x_{t+1:\inf}, a_{t+1:\inf}}[R_t|x_t,a_t]$
$V^\pi(x_t) = \mathbb{E}_{a_t}[Q^\pi(x_t,a_t)|x_t]$
The advantage function provides arelative measure of value of each action since $E_{a_t}[A^pi(x_t,a_t)] = 0$
$A^\pi(x_t,a_t) = Q^\pi(x_t,a_t) - V^\pi(x_t)$
Taking a stab at implementing ACER
My previous actor critic implementation used a replay buffer to collect experience from a bunch of simulated environments. The performance on Cartpole was pretty good but while I was playing with the code I started reading the ACER implimentation (Sample Efficient Actor-Critic With Experience Replay). I think it would be good experience to implement this with all the bells and whistles. From what I gathered the additional pieces I need to add are :
Retrace Algorithm
Truncated importance sampling with bias correction,
Stochastic dueling network architectures
efficient trust region policy optimization
So with my previous implementation I was sampling actions from the policy I was optimizing so I had an ‘on policy’ update. I believe I’ll be implementing an off-policy method with ACER.
The Retrace Algorithm
Retrace Paper : https://arxiv.org/pdf/1606.02647.pdf
What is the retrace algorithm doing?
It is an off-policy return based reinforcement learning algorithm.
In the policy evaluation setting, we are given a fixed policy π whose value Qπ we wish to estimate from sample trajectories drawn from a behaviour policy μ.
In the control setting, we consider a sequence of policies that depend on our own sequence of Q-functions (such as ε-greedy policies), and seek to approximate Q
It was designed with three properties in mind:
Low Variance
Safe use of samples collected from any behaviour policy
Is efficient as it makes the best use of samples collected from near on-policy behavior policies.

The general operator that we consider for comparing several return-based off-policy algorithms
(Section 2 : Safe and efficient off-policy reinforcement learning)

Actor Critic with CartPole
For the past few weeks I’ve been working on an Actor Critic RL implementation as a sort of sandbox to test implementing some RL concepts. The following is a document explaining some of the lessons learned as well as demonstrating the code.
Originally I was working with a single colabs notebook but the organizational benefits of splitting things into separate files was necessary as the code grew. Below are links to the github repositories for both the ipynb and the python files I’ve been working on
Code:
Python Files : Github
Colab Notebook : CoLab *Note To Self : Need to add this link. Notebook needs a little cleaning up first..
Features :
Utilizing vectorized environments to speed up training. I noticed while looking at the replay buffer that the inference from f(state)=action_logits was taking far longer than the env.step(action) operation. With multiple environments I can fill the buffers faster by inputting a state tensor and receiving an action_logit tensor in return. Since tensor opperations are parallelized on the gpu, this saves time by reducing the number of inference calls.
Variable N-step updates. In the training loop I can set how many steps I want each environment to take before performing a training update. Below are some plots comparing N=1, N=10, and N=100. For this test that are 100 environments running.
Currently I’m determining the performance of the algorithm by keeping track of each environments cumulative rewards in the replay buffer. This allows me to avoid running evaluation environments which could become painfully slow as episode length increases. Below are plots comparing an evaluation environment vs the batch_mean_reward.
Current Implementation Problems :
The replay buffer is tailored to the environment and I need to manually change it when I change to different environments. I created different classes of replay buffer for different environments but I don’t love this solution, it is just a stopgap.
My current implementation doesn’t work with the standard environments right now. In order to speed up training I added a cumulative reward to all the environments which is returned during step in the info dictionary. I can average terminal rewards by multiplying the cumulative reward and done tensors, summing the result and dividing by the number of done=True in the batch. I did this to avoid needing to run evaluation environment trials which were tediously slow. I probably could do something with running those eval trials in a different thread but that is a future problem to work on.
self.total_reward_metric sometimes can be weird if there are no transitions with done=True in the batch. Since I’m averaging over 10 training update steps this usually isn’t the case but if it does happen that no done=True states were seen, the result of the total_reward_metric is 0. This was negatively effecting the reported performance of the agent. This might be able to be fixed by checking for the length of the entries in the metric variable.
The replay buffer is sampled sequentially instead of randomly. This wasn’t an issue when I had written my own replay buffer but there doesn’t seem to be an easy way to do this with the tensorflow agents replay buffer…
Observations :
The infinite episodes seemed to have a degrading quality on the policy. It felt like it got so good at performing one task that it started to get worse at more infrequent tasks such as recovery and not going past the linear boundaries. To fix this I started limiting the episodes to 1000 steps.
I think learning only occurs through trial and failure. I started increasing the sampling range of the starting states to give the agent more examples of challenging situations. This seemed to improve the performance and learning rate of the agent.
Learning seems to come from the difference in rewards received. In cartpole every step results in a reward of (1). Thus the only chance for the critic network to update its idea about state values happens at the episode termination when the reward is (0). After some updating the reward begins to propagate back from terminal states towards starting states. I guess I think of this as learning occurring due to the difference in rewards.
Decorating the training step with @tf.function resulted in about a 3x speed increase
Experiments :
Learning and Performance with different environment steps and training steps
Environment steps are how many steps each environment takes before a series of mini-batchs are used to update the agent policy. When each environment takes a step they add the experience to the experience replay buffer.
Training steps are how many mini-batch updates are run between environment step updates